You are currently viewing documentation for Linnworks Desktop, if you are looking for Linnworks.net documentation, click here.


Add New Integration

Overview

This guide is a walk-through of the steps required to integrate Flubit Accounts with Linnworks. Once fully integrated, Linnworks provides the ability to: ~

  • A Weflubit account which can be registered by going to https://weflubit.com.
  • An active Amazon channel setup within Linnworks.
  • Your Amazon Prices stored in Linnworks within the Listing Descriptions tab.
  • A Linnworks Anywhere database.

Quick Guide

1. Retrieve your API credentials from Flubit.

2. In Linnworks, go to Settings -> Channel Integration.

3. Click on Add New Channel -> Select Integrate next to Flubit.

4. Enter your API Credentials and click Test -> Create.

5. Click on the Config button next to the newly created Flubit channel.

6. Specify a Standard and Express Shipping Service/Price (Optional).

7. Choose which Amazon subsource you wish to use.

8. Click Save.

Detailed Guide

1. Retrieve your API Credentials from Flubit.

  • Go to https://weflubit.com.
  • Sign into your WeFlubit account.
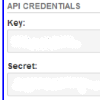
  • Select Settings. Your API credentials will be visible in the lower right hand corner. Fig 1.1


Fig 1.1 Flubit Credentials

2. In Linnworks, go to Settings -> Channel Integration.

  • Login to Linnworks.
  • Select the Settings tab at the top of the screen. Fig 2.1
  • Select Channel Integration. Fig 2.2
Fig 2.1  Settings Fig 2.2  Settings

3. Click on Add New Channel -> Select Integrate next to Flubit.

  • Click on the Add New Channel button. Fig 3.1
  • Click on the Integrate button next to Flubit. Fig 3.2
Fig 3.1  Add New Channel Fig 3.2  PayPal

4. Enter your API credentials and click Test  -> Create.

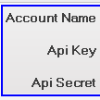
  • Specify a name to reference the account into the 'Account Name' field and paste the API credentials gained in Step 1. Fig 4.1
  • Click on the Test button and then click Create. Fig 4.2
Fig 4.1  Add New Channel Fig 4.2  PayPal

5. Click on the Config button next to the newly created Flubit channel.


Fig 5.1  Add New Channel

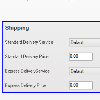
6. Specify a Standard and Express Shipping Service/Price.

  • Select the shipping service you wish to use for Standard and Express Delivery from the dropdown boxes and specify the same shipping costs as those setup in your WeFlubit account. This is an optional field but we recommend you fill this in so the shipping details show on the order XML. Fig 5.1
Fig 6.1  Add New Channel

7. Choose which Amazon subsource/s you wish to use.

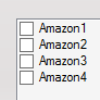
  • Select one or more Amazon subsource from the list shown. Fig 6.1
Fig 7.1  Add New Channel

8. Click Save to finish setting up the integration.

  • Click save to finishing setting up the Flubit Channel Integration. Fig 7.1
Fig 8.1  Add New Channel

Inventory Mapping

Refer to the following guide on how to setup Inventory mapping which is the next step once the channel has been setup.