You are currently viewing documentation for Linnworks Desktop, if you are looking for Linnworks.net documentation, click here.


Shopify Integration - Order Management and Inventory Control

Overview

  • This document describes how to set up Shopify within Linnworks. There's also information about what functions Linnworks can perform while working with Shopify and how to configure this channel
  • The Shopify Integration allows Linnworks to Automatically download new orders, update order status, submit fulfilment data and synchronise stock levels
 

1 Shopify Integration

  • 1.1 Open Linnworks
  • 1.2 Go to the settings tab and open Channel Integration Fig 1.1
  • 1.3 Click on Add new channel button Fig 1.1 to bring up the list of Channels that Linnworks integrates with
  • 1.4 Scroll down and select Shopify Fig 1.2
  • 1.5 Click on the Integrate button to open the Shopify Integration Config page Fig 1.3
Fig 1.1  Channel Integration Fig 1.2  Add New Channel Fig 1.3  Shopify Config Page

2 Shopify Details and API Keys

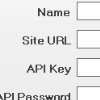
  • 2.1 In this screen Fig 2.1, enter your sites URL and API details, these can be obtained by:
    • a) Log into the admin area of your Shopify site
    • b) Go to Apps > Private Apps
    • c) Click "Create a Private App" if an API key isn't shown. Add a title, and click Save.
    • d) Copy the API Key and API Password fields
  • 2.2 Once filled in click Test to test the connection Fig 2.1
  • 2.3 If the Test is successful and all the fields are complete click Save Fig 2.1

For more information on generating the Shopify API keys, please see their documentation.

Fig 2.1  Enter Shopify Details
Your site url needs to be your shopify subdomain NOT your website domain. For example linnworks.myshopify.com

3 Shopify Config Settings

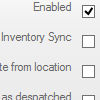
  • 3.1 Enabled, if ticked, will turn the channel active and will start downloading orders with the sync
  • 3.2 Inventory Sync, when ticked, will keep stock levels updated
  • 3.3 Inventory Update from location, if this is ticked specific locations can be choosen to be updated please see http://www.linnworks.com/Doc/shopify_location_mapping  for a detailed guide
  • 3.4 Mark as despatched, if this is ticked processed orders will get marked as despatched
  • 3.5 Notify Customer, tick this if you wish to notify customers upon despatch
  • All as seen in Fig 3.1
Fig 3.1  Shopify Config Settings

4 Default Settings

  • 4.1 Default Max Listed Quantity - This specifies the maximum level that will be sent to the channel. The level published will never be higher, even if there is more stock within Linnworks Fig 4.1
    • Example 1
      • Max Listed Quantity = 10
      • Linnworks Stock Level = 20
      • Therefore ~ Listed Quantity = 10
    • This will improve sync times and lessen the load on the Shipfy account by only sending an update to the stock level when it falls below the Max Listed Quantity
  • 4.2 Default Max List Percentage - This will send up a percentage of the current Linnworks available stock level or Max Listed Quantity. For example if you have 10 in stock and set the percentage to 50, 5 will be sent to the channel. Helping to give you a stock buffer so that you don't run out or oversell Fig 4.1
    • Please be aware that Linnworks will always round down
    • Example 2
      • Default Max Listed Quantity = 0
      • Linnworks available stock level = 12
      • Default Max Listed Percentage = 60
      • Therefore ~ Listed Quantity = 7 as 60% of 12 = 7.2
    • Example 3
      • Default Max Listed Quantity = 50
      • Linnworks Available Stock level = 200
      • Default Max Listed Percentage = 60
      • Therefore ~ Listed Quantity = 30 as 60% of 50 = 30
  • 4.3 Default End When Quantity - This enables you to force the listing to end early when the available stock level comes down to the specified amount as opposed to the default value of zero Fig 4.1
    • Example 4
      • Default End When Quantity = 5
      • Linnworks Available Stock Level changes from 6 to 5 due to an order
      • Therefore the listing on Shopify is ended early, leaving stock available for other sales channels
Fig 4.1  Shopify Default Settings

5 Channel Integration Screen

  • 5.1 Once you have set up your Shopify account to work with Linnworks it will appear in the list of channels on the Channel Integration screen Fig 5.1
  • 5.2 From here you can enable / disable integration and inventory sync for each individual channel as well as configuration and inventory mapping tools Fig 5.1
  • 5.3 To enable / disable individual channel integration within Linnworks, simply click the small circle in the Enabled column that corresponds to the channel you wish to alter. A green light means that the channel is enabled in Linnworks, while a red light denotes that it is disabled Fig 5.1
  • 5.4 The same process applies to the Inventory Sync function, clicking a circle will toggle between enabled and disabled for the specified channel. A green light means that the Linnworks will sync inventory with this channel while a red light indicates that it will not Fig 5.1
  • 5.5 Clicking the Config button for a specified channel will bring up the Account Config menu for that channel. This is the same screen that appears when you first set up Shopify Integration. From here you can make changes to the settings, remembering to Test and click Save when you have finished making alterations
  • 5.6 Click on the Config button to open Shopifys Integration Config page Fig 5.2
Fig 5.1  Shopify Integrated Main Fig 5.2  Shopify Integrated

6 Shipping Method Configuration

  • 6.1 To configure shopify shipping services so that orders downloaded are assigned the shipping method that is set on shopify, add either the shipping title or code that is provided by shopify to the postal service methods tag