MetaPack configuration and setup
Easy Steps to Using MetaPack
1. Contact MetaPack
|
2. Register an Account
|


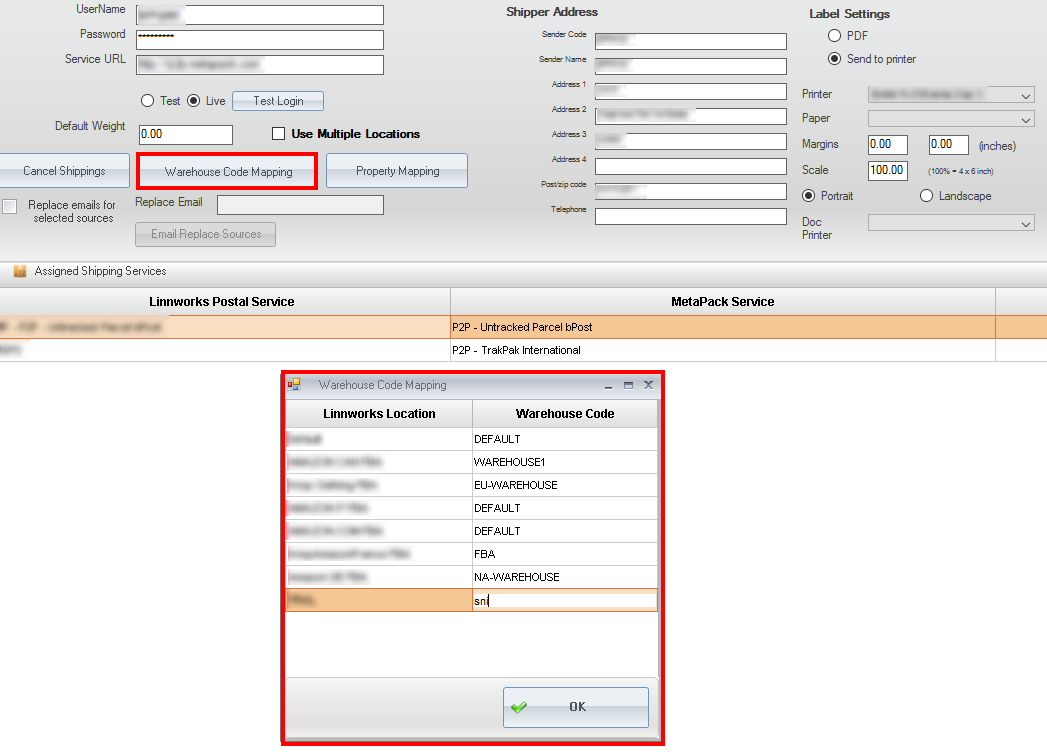
Label Settings
You can print labels into
- PDF file
- Directly to thermal printer
- Directly to a standard printer (Laser recommended)
- Embed shipping labels on the invoice or packaging slip.
Choose where you want to print the labels to in the Label Settings
- PDF file – you can choose the layout of labels on the PDF A4 sheet.
- 1 Label per page
- 2 labels per page
- or 6 by 4 inches direct output
- Send to a printer.
- Choose printer you want to print to
- Select paper type
- If you need to set margins, set left and top margin (some thermal printers require margins to be configured for accurate positioning of the label)
- Scale would normally be set to 100%. However if you need to adjust the label size because of the thermal printer margins and type of the label roll, you can reduce the label size by percentage of the original size.
- Set portrait layout or landscape (thermal printers print in portrait). However DYMO printers have configuration option to switch to landscape by default, in this case you need to switch to landscape in Linnworks too.
Setup MetaPack services
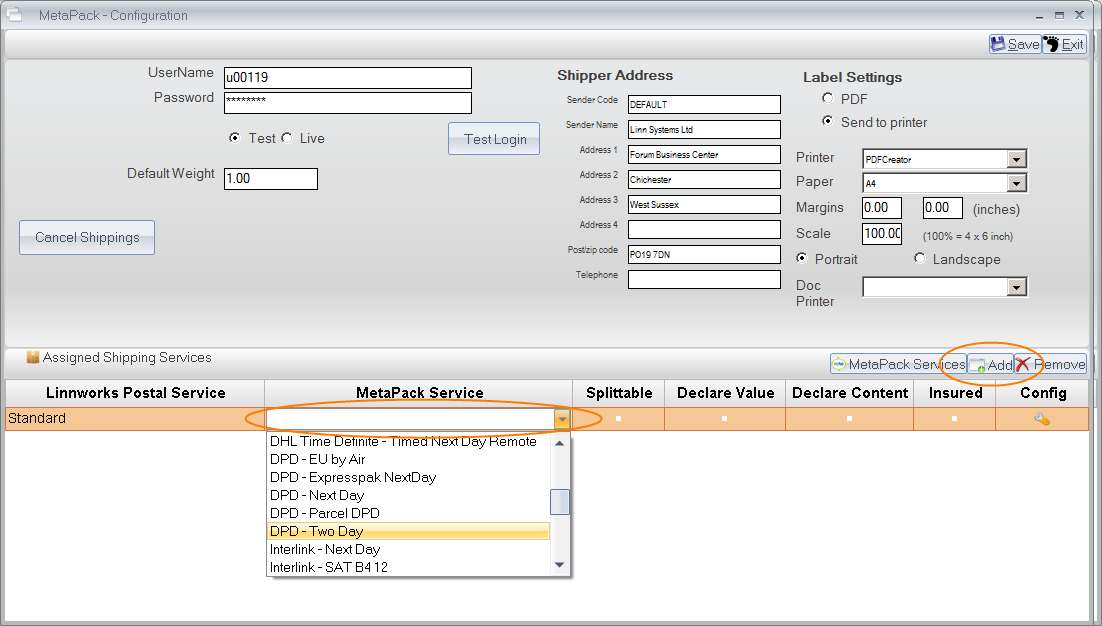
Once you have entered your credentials and tested the account. You can add or map shipping services to the list.
To map existing postal service to MetaPack service
- Click Add
- select the service from the list
- then find matching service from the drop down box
- Select options for the service:
- Splittable - when you print a label for this service, you will be prompted if you want to split the package
- Declare value - show value on label
- Declare Content - show content on label
- Insured - insure the package
- Hit enter
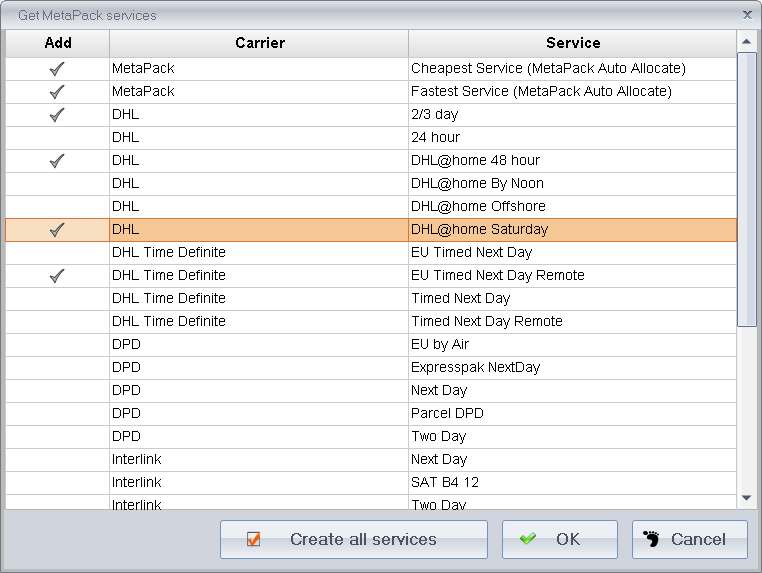
Add default list of services
You can automatically add the list of available services to Linnworks from your MetaPack account.
- Click MetaPack Services
- Set a tick next to the services you want to Add and click OK;
- Or Click Create All Services
Setting Cheapest and Fastest Service
Linnworks automatically adds two services to the list, these are cheapest and fastest auto-allocate service. These services are used to tell MetaPack to automatically allocate consignment to a cheapest or fastest service. When you print a label for an order associated with this service Linnworks will instruct MetaPack to allocate the consignment to cheapest or the fastest service and return the shipping label for the allocated consignment.
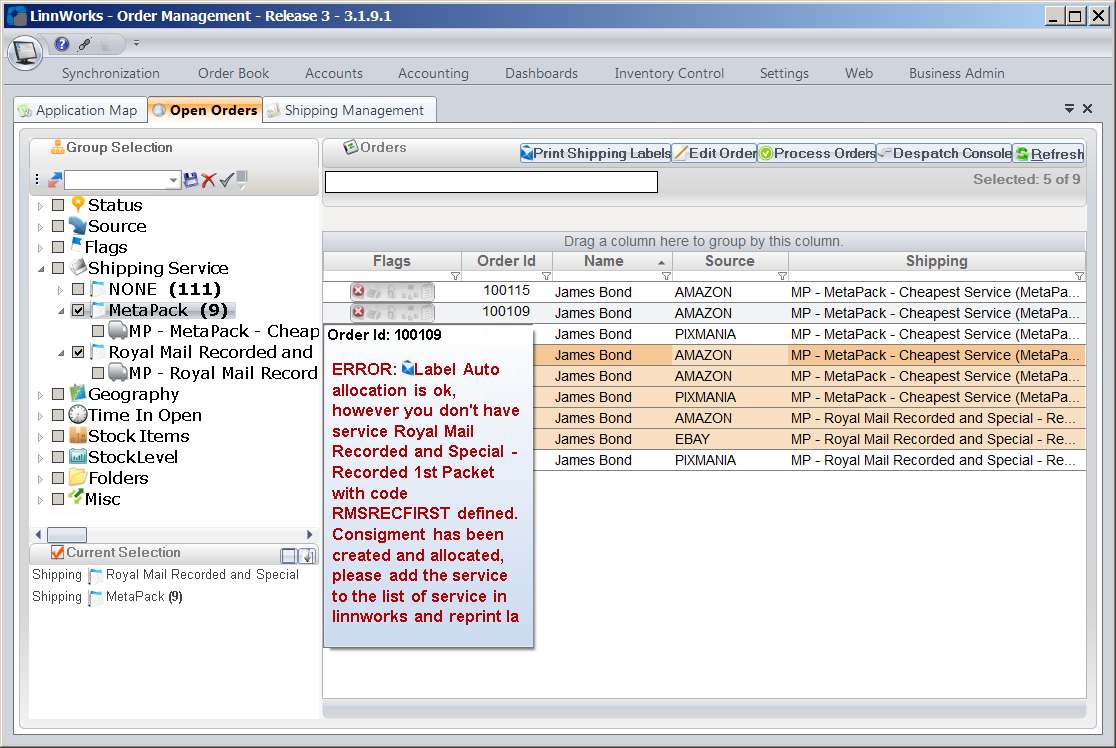
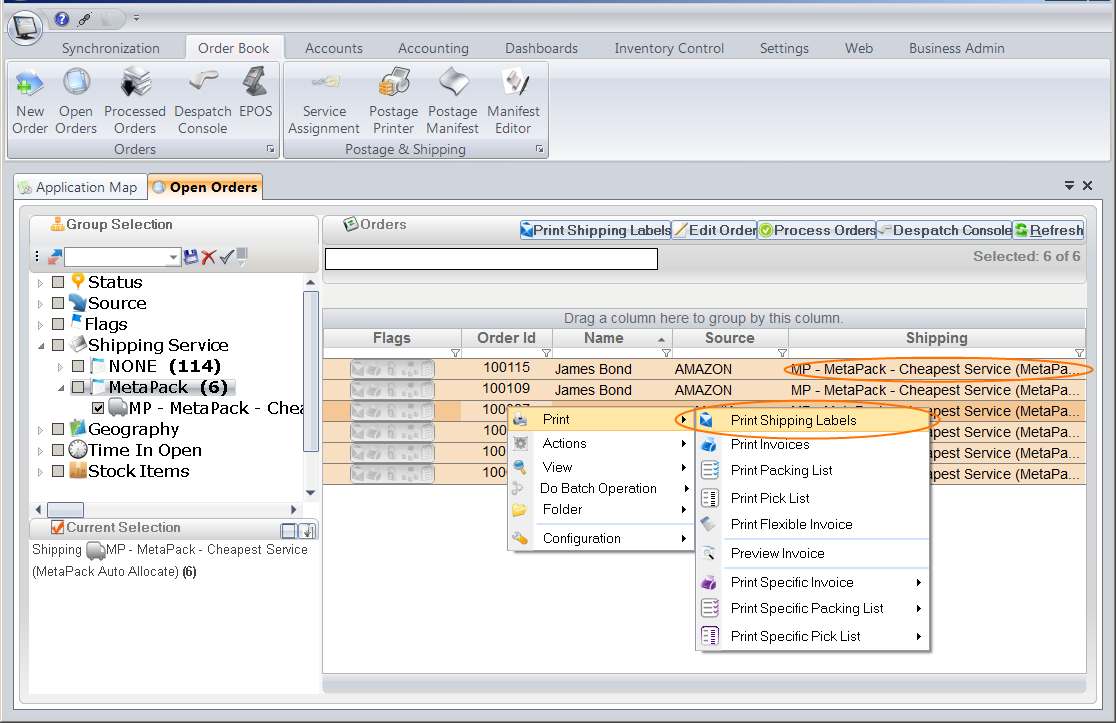
Printing Labels
Shipping labels are printed from Open Orders screen, by selecting multiple orders allocated to one of the MetaPack Services, right click > print > Print Shipping Label.
Reprint labels
Linnworks will automatically recover the label if it has been created before. To reprint a label simply Print a new shipping label from Open Orders.
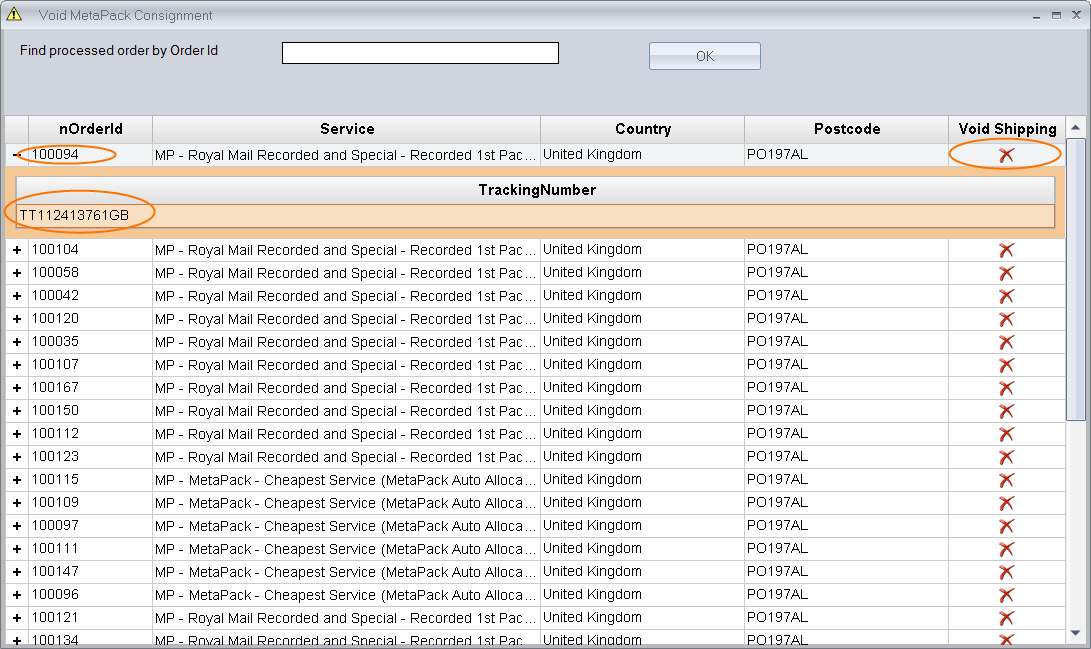
Cancel consignment
- To cancel / void consignment
- Go to Settings > Shipping Management > Cancel Shipment
- Select the order you want to cancel consignment
- Click Delete to cancel consignment
Manifests
You have to generate manifest on MetaPack Delivery Manager website. Linnworks does not provide functionality for creating and printing manifests for consignments generated via MetaPack.
Documentation for International Shipments
MetaPack will generate CN22 and other appropriate documentation for an international shipment. The documentation will be printed as a separate label. In case of invoice embedded integrated label, the documentation will be printed on the next page, inside the peel-off section of the invoice.
Warehouse Codes
Part of the Metapack Integration allows you to map a Linnworks location to a Metapack Location via a location code. To create a new location in Metapack, you must first go to Set Up

Next, go to Warehouses

Finally, click create Warehouse
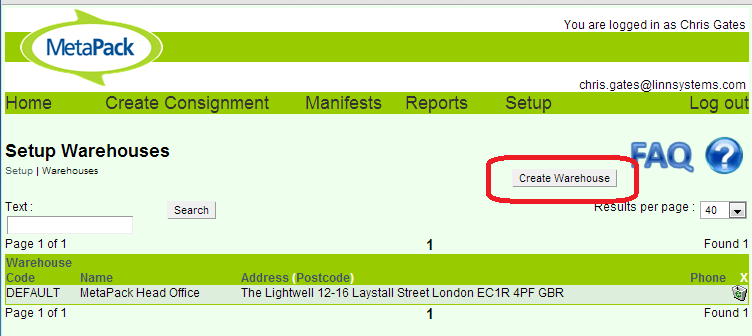
When creating, you can assign the warehouse a 'Warehouse Code'. This will allow you to map this code to a Linnworks Location.
In Linnworks, tick the Use Multiple Locations checkbox, then click the Warehouse Code Mapping button in your Metapack integration, and use the following table to map Linnworks locations to Metapack location codes.
If you have a particular service that you know has to always go to a specific Metapack warehouse regardless of Linnworks location, you can override this mapping in the Additional Service Configuration section.
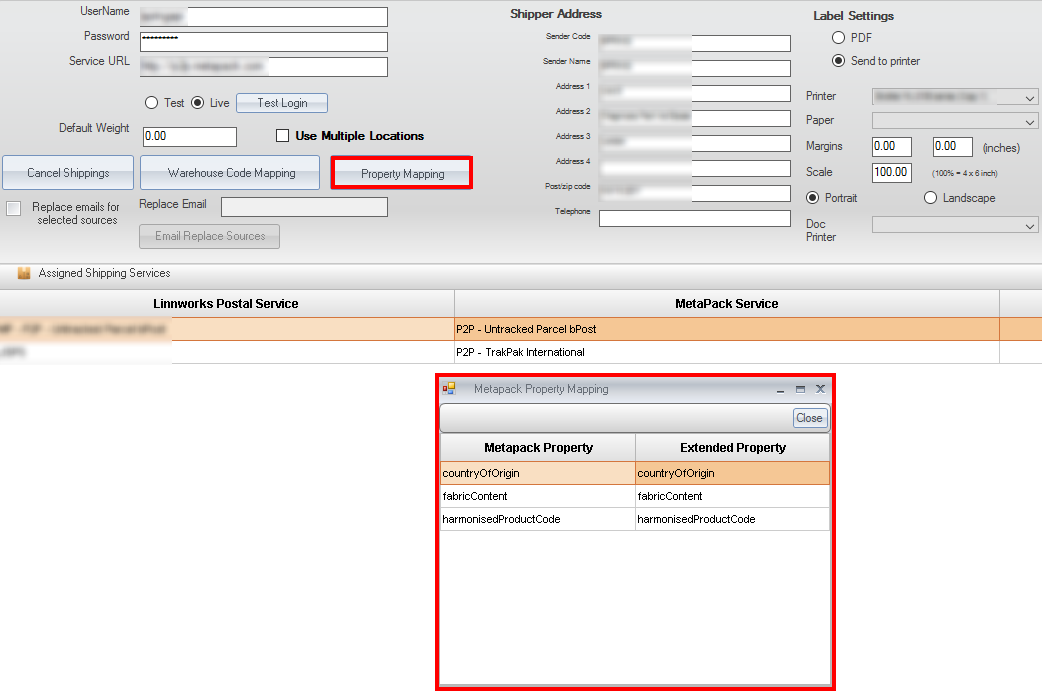
Property Mapping
For international shipments, Metapack can accept a handful of extra properties when Linnworks submits order data. These properties are:
- countryofOrigin
- fabricContent
- harmoniseProductCode
If you need to send these properties in Metapack, then you can map them to extended properties in Linnworks. When printing labels for international shipments Linnworks will retrieve the values from the linked inventory items and submit these to Metapack for each item in the order.
In Linnworks, click the Property Mapping button in your Metapack integration, and use the following table to map Linnworks extended properties to Metapack properties.
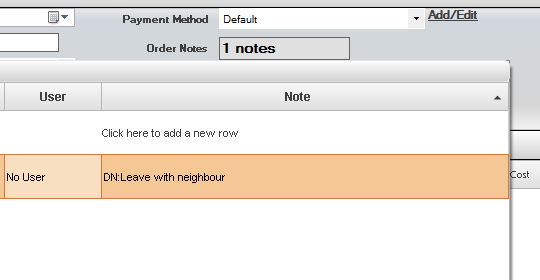
Delivery Notes
To add delivery notes to an order, you can add an order note beginning "DN:" and with a maximum of 26 characters.
Everything after the "DN:" will be printed on the label
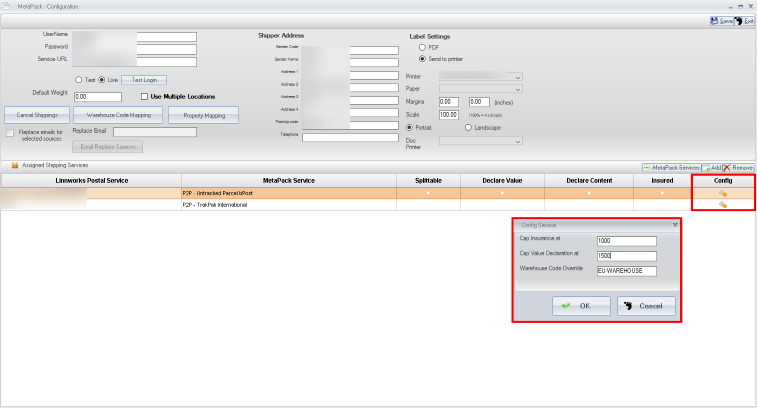
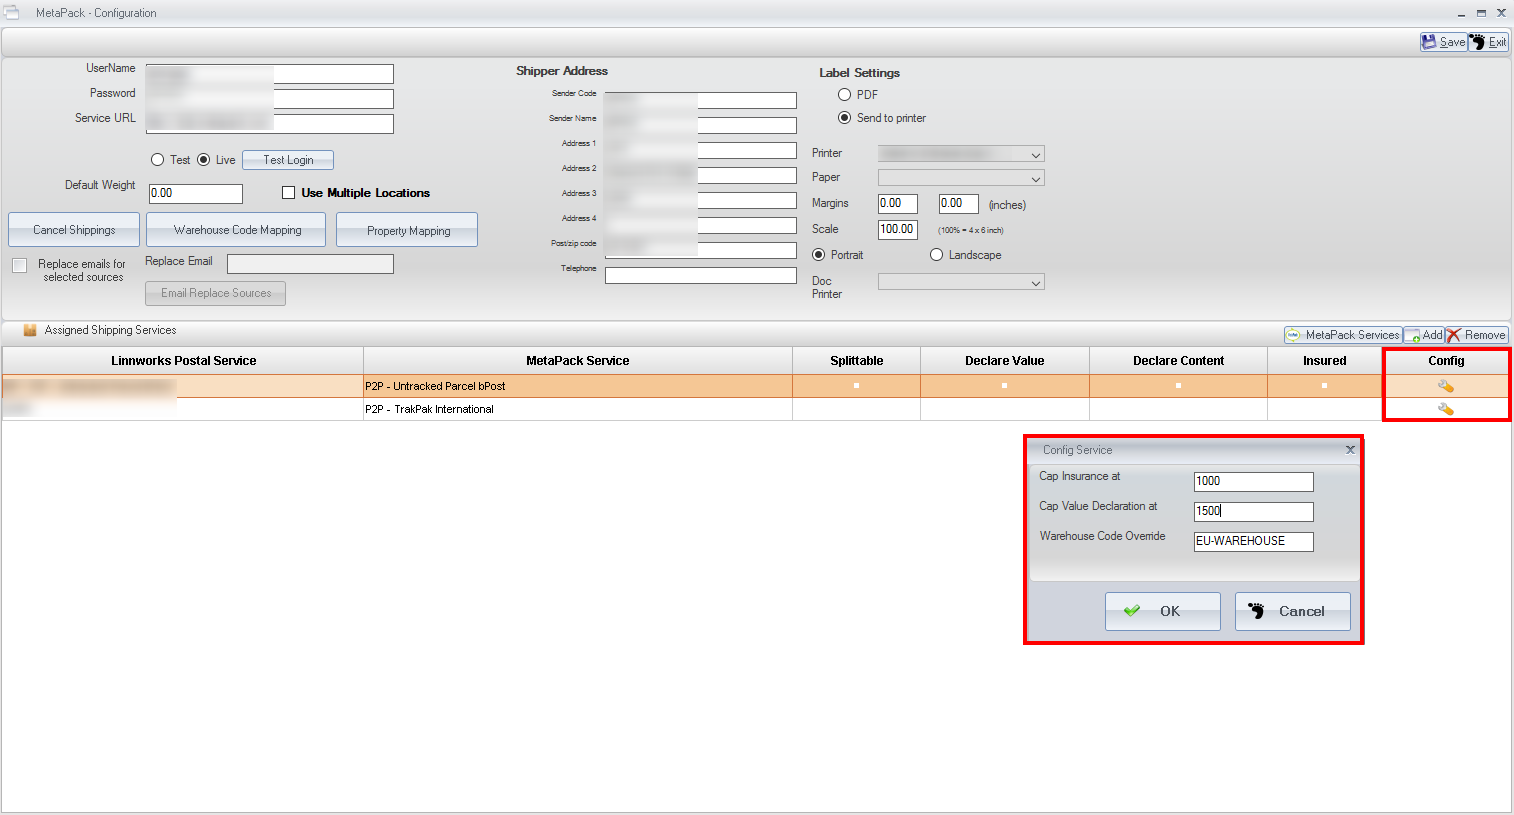
Additional Service Configuration
Every Metapack service that you add to your Metapack integration can be confiured differently. These options include
- Capping insurance values, so that any shipments over a certain value are not insured
- Capping value declaration, so that any shipments over a certain value do not have their value declared
- Overriding warehouse codes; you can enter a different Linnworks location in this field, so that regardless of what location that order was in, Linnworks will use this specified location.
You can configure these settings by clicking the Config button next to each service in your Metapack integration
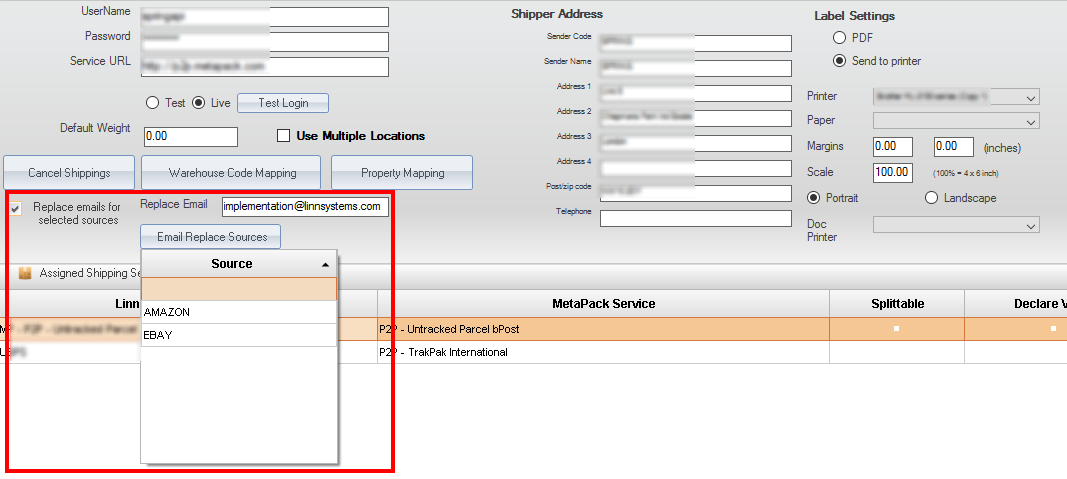
Replacing the submited order email address
In some cases, you may wish to replace the buyer's email that's usually sent to Metapack with your own email address. This can be configured in the Replace Email section in your Metapack integration.
You can even configure this feature to only apply to orders from specific channel sources.