Template Designer
Overview
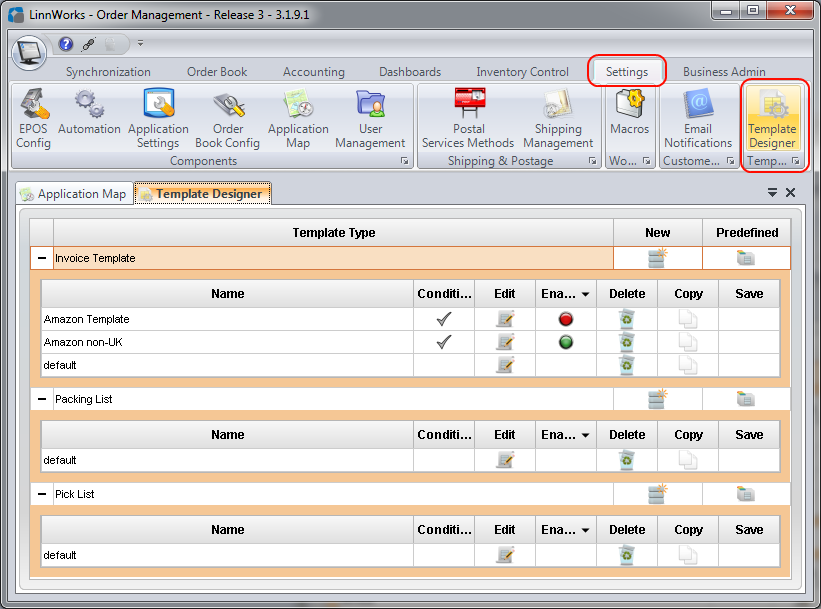
The template designer is used to manage Invoice, Packing List and Pick List templates. Each template can have their own printer, page size and condition as well as conditional labels within the template themselves. This allows for more flexible approach when printing invoices, packing lists and pick lists. Users also have a choice predefined templates to choose from as well as creating their own.
Legend
![]() Create New template
Create New template
![]() Load Predefined templates
Load Predefined templates
![]() Template has printing conditions set to it
Template has printing conditions set to it
![]() Edit Template. Clicking this will display the template editing screen.
Edit Template. Clicking this will display the template editing screen.
![]() Template is Enabled, this means that it is able to print.
Template is Enabled, this means that it is able to print.
![]() Template is Disabled, this means that the template won't print even if it's conditions are fulfilled. The default template cannot be disabled.
Template is Disabled, this means that the template won't print even if it's conditions are fulfilled. The default template cannot be disabled.
![]() This button copies the template. This is useful if you are creating variations of the same template will small differences.
This button copies the template. This is useful if you are creating variations of the same template will small differences.
Editing a template
To open the template editor simply go to Settings -> Template editor and click ![]() (edit) for the template you wish to wish to edit.
(edit) for the template you wish to wish to edit.
Depending on the template there may be more or less options, for example Packing and Pick Lists do not allow for Printing Conditions.
Editing Legend
| Edit Selected: This will bring up the editor the the element selected | |
| Delete Selected: This will deleted the selected element. | |
| Copy Selected: This will duplicate the selected element. | |
| Send to Back: Sending an element to the back will mean that all other elements will be on top of the element. | |
| Bring to Front: Bringing an element to the front will display the element on top of all others |
Printing Invoice
Each invoice can have it's own conditions on when it prints as well as which printer and page size.
Printing Conditions

When you click the Printing Conditions button a screen will appear where you can set the conditions in which the template will print.

In the above example the invoice will only print when the source of the Order is 'DIRECT' and the total order charge is greater than 20.
You can select from the variables menu a list of usable variables.
Please refer to the following more detailed guide for the list of available Operators and further sample conditions
When using the AND operator you cannot use the same variable twice. You need to use the OR operator.
Setting a Printer, Page Size and Orientation
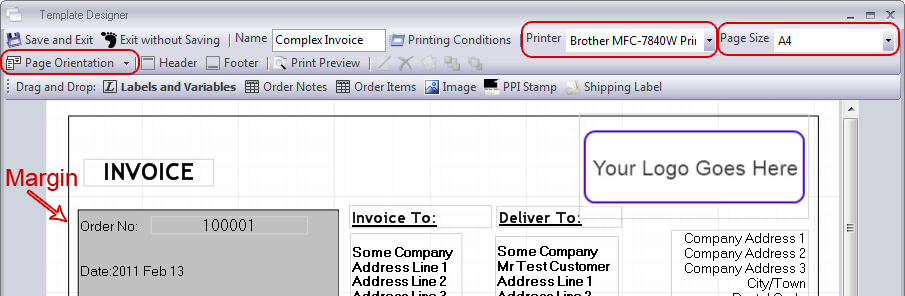
You can select the printer and page size by using the menus highlighted in red below. On of the advantages of doing this is if you have different sized invoices depending on source, order size etc you can have individual invoices. Once the Printer and Page Size have been selected the template designer automatically calculates the margin based on the printers settings. This means that you can design your invoice without having to worry about working out margins.
Page Orientation can also be set from Portrait to Landscape to allow a more flexible design.
If you wish to use a page size that does not exist for your printer you can do so by select custom and filling the dimensions in. Margins may not display for custom page sizes.
Duplex Printing
Linnworks does not support Duplex printing. If you require printing on the reverse side of an invoice with additional informtion such as 'Terms and Conditions' the following are the only solutions available.
- Use Pre-printed documentation
- Use a second speific invoice and reload the invoices to print on the reverse side
Header and Footer
The header and footer elements are fixed at the top and bottom of the page. These can contain fixed text or variables which can be inserted via the editor. When the template is printed these will display on every page printed. The position is fixed however alignment of text is variable.
The buttons for Editing the header or footer can be founjd on the tool bar at the top of the template designer window.

Labels
To add a new label simply drag and drop it to the template. To change it's size drag on of it's corners. To change it's position, click on the label and drag it to the position you require. You can also use the arrow keys to move the label.
Editing a Label
To edit a label double click on it. A new box will appear where you can edit the label.
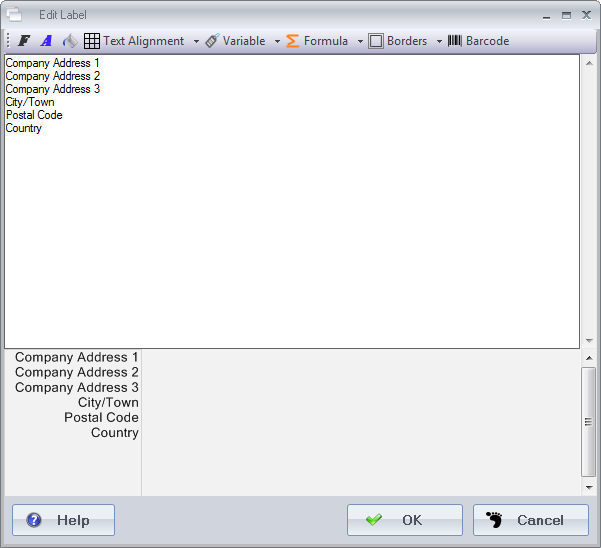
From the above screen you can edit the labels Font, Font Colour, Fill, Text Alignment, Borders.
You can insert variables from the Variable menu. Variables are dynamically created tags that generate text about the order. For example if you wanted to insert the the customers shipping address you would choose shipping address from the variables menu. This would insert the following tag [{cShippingAddress}] which would display the customers when the Invoice is printed.
Another feature of labels is you can display a barcode of the text you've inserted or the text generated by a variable. This can be very useful if you wish to have order numbers with barcodes. The barcode it's self is a 3of9 variable length barcode.
Editing Order Notes and Order Items
The Order Notes and Order Items tables are premade grids for displaying Notes and Information. To edit the table either double click on it or click the edit button on the menu bar.
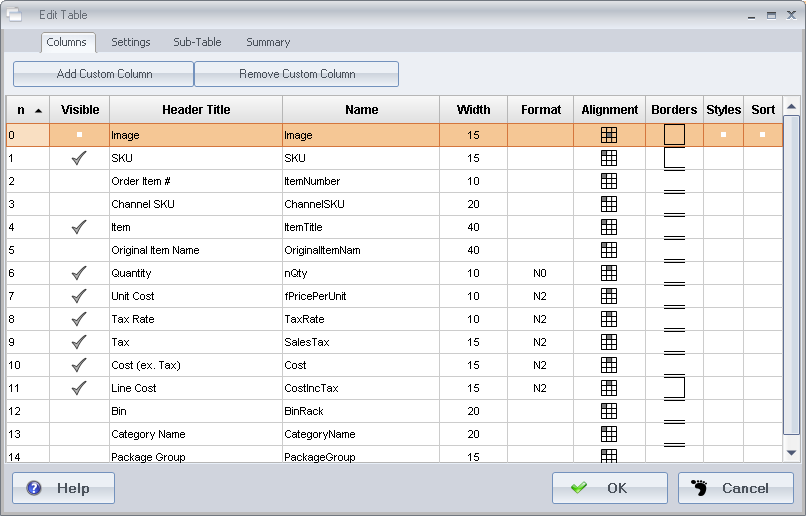
To change the order in which the columns appear change the number in the n column. Visibility can also be set by clicking in the visable column.
Format: Format is used for displaying values in a specific way. For example N2 means that numbers will be displayed to two decimal places.
Formatting Columns
Alignment can be changed by clicking on the alignment box. Each click will change the text position, you will see the change in the grey box's location with in the alignment grid.
Borders for each row can be changed by clicking on the borders, this will bring up a menu where you can select which side you want the border to appear on.

To change the style you can click on the style column, this will bring up an editor.
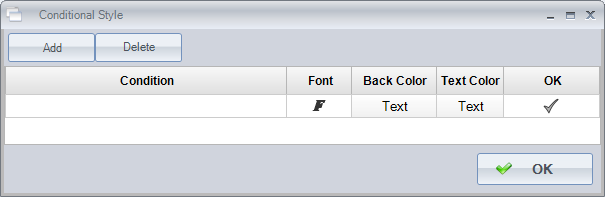
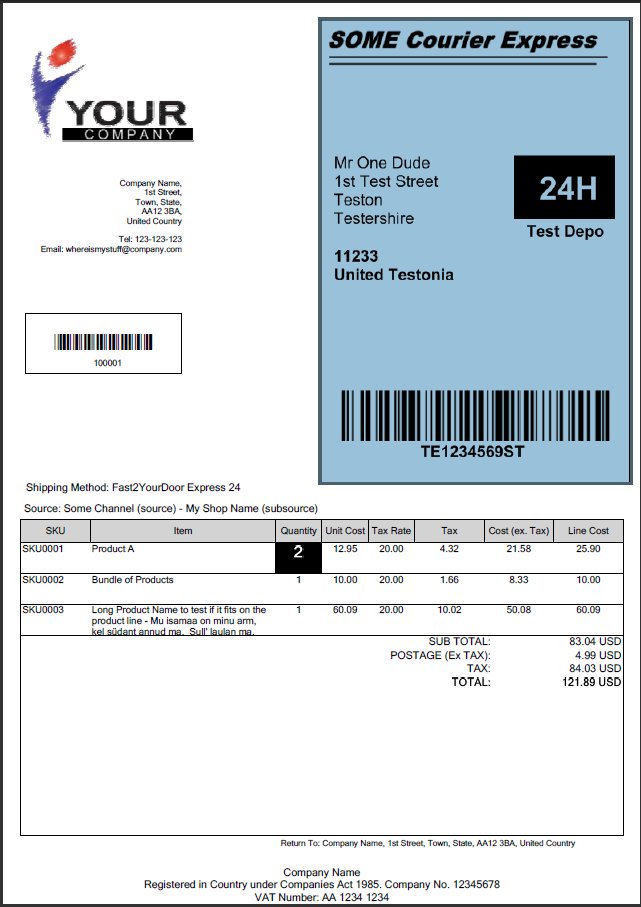
With column styles you can have multiple styles for the same column. This can be done by creating a condition for the style. This is a useful feature if for example you wish to highlight multiple quantities.
An example of a condition for a text style would be: [{nQty}]>1
Sort can be be applied to a column or columns to sort the table in ascending or descending order.
Images
Images can be applied to the Template by clicking on the Image label and draging it to the template.
To edit the image either click the edit button or double click on the image. You can select the image, set borders and set the image sizing.

Scripting can be added to the image to set the conditions for when the image should be displayed. Click on the Visibility tab and select the variable that need to be tested. In the example below this image will only be displayed if the destination country is NOT equal “United Kingdom”

Please note: The expressions are case sensitive and so to be safe it is recommended that ucase[] method is used. For example ucase[[{cCountry}]] <> ucase["United Kingdom"]
PPI Stamp
PPI Stamps can be included in the shipping label, using the PPI Stamp control. If you click the control in the top bar, and drag it into the Template, it can then be positioned by clicking and dragging, or edited by double clicking it.
In the editor window that is opened, you can enter your PPI Account number, which will be embedded in the PPI stamp. You can also select what the Default Stamp shown in the template will be. You can select one of the available options from the drop down, or leave it empty, so a PPI will only be shown for the appropriate service.
In the lower part of the form, you can select a Postal Method from the left hand column by clicking on the top cell and selecting an option from the dropdown, and you can select the image on the right that will be shown. The Entries NOT ending in 'RM' should not be used, as they are the older stamps, and down't include the 'Delivered by Royal Mail' section. Allow enough space to the right for the full stamp to be displayed. This can be tested by adjusting the default stamp setting.
When you have setup all the services and stamps you wish to, click on 'OK' to save your changes.
If you have different templates you are able to set different PPI numbers in the configuration of their PPI Stamp controls.

PPI Stamps are fixed in size.
Shipping Label
Shipping labels can be printed directly to invoices. This is useful if tare off/peal off sections on an invoice are available. To add a label to an invoice, drag and drop the Shipping Label element to the invoice.
Shipping labels are fixed to 6 by 4 in size and can be set to portrait or landscape. This is the standard for label printing.
These labels can be printed from any of the integrated shipping methods. If extra labels are required they will be printed on subsequent pages.
PDF - East Asian Multi-Lingual Support
The template designers fully support both Chinese and Japanese characters. However when attaching PDF versions of the template to an email through Linnworks email functionality specific character sets have to be used to prevent all characters from appearing as ???
Some known fonts that are supported are.
- FangSong
- Microsoft JhengHei
- Microsoft YaHei
- KaiTi
- SimHei