You are currently viewing documentation for Linnworks Desktop, if you are looking for Linnworks.net documentation, click here.


Warehouse Transfer - Step by Step

Overview

The purpose of this guide is to walk through step by step the complete process of transferring stock from one location to another.

In this scenario, there are two locations.

  • Warehouse 1
  • Warehouse 2

We will be transferring stock for 'Stock Item 1', a quantity of 5 from Warehouse 1, to Warehouse 2.

Step 1 - Selecting the Location

The first step in transferring the stock from one location to another would be to select the location view on the main warehouse transfer screen. We need to ensure that we are currently viewing either one of the locations in order to transfer the stock to or from.

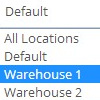
To change the current location to the 'From' location, in this case, Warehouse 1, we select the location using the drop down box on the top left hand corner of the screen. Fig 1.1

Fig 1.1  Location Selection

Step 2 - Creating the transfer

As we are transferring stock from Warehouse 1, and we are in Warehouse 1 now, we need to click on 'New Transfer', which will create a new transfer where the 'From' location is our current location, in this case Warehouse 1.

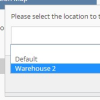
Click on 'New Transfer' and select the 'To' location, in this case, we want to transfer stock from Warehouse 1, to Warehouse 2, so we select Warehouse 2. Fig 2.1

Fig 2.1  Location Selection

Step 3 - Adding items to the transfer

The Edit Transfer screen will open to display the newly created transfer, notice that on the top right, the from location is Warehouse 1, and the to location is Warehouse 2.

We now need to add the stock item to the transfer, to perform this action, do the following:

  • Click on Add Item
  • Search for the SKU or Item Title
  • Select the item
  • Click Select to finish
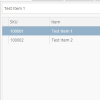
Fig 3.1

Now that the item has been added to the transfer, we need to specify the request quantity, which is the quantity that Warehouse 2 has requested that we send to that location, in our case, its 5.

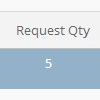
Double click on the Request Quantity field for the item and set the quantity to 5, then press Enter to save changes. Fig 3.2

Fig 3.1  Add Item Fig 3.2  Request Quantity Change

Step 4 - Changing Transfer Status

Our transfer is currently in the draft state. As we have now completed creating the transfer, we can set this transfer to Request, meaning that the other location needs to acknowledge and accept the transfer.

To change the transfer status, click on the status selection box, which should say 'Draft' and select 'Request'.

Once this has been completed, whoever is at Warehouse 2 can look at this transfer and change the transfer status to Accepted, at this point, you then need to acknowledge and start packing the transfer ready to be shipped to the new location.

  • Set the status to Accepted.
  • Set the status to Packing.

Step 5 - Packing the transfer

Now that we have reached the packing stage, we need to start packing the transfer so it can be shipped to Warehouse 2. On the packing screen, we can create bins for the items, which can represent pallets and configure how many items were packed on the transfer.

We will first create and assign one of our items to a new bin.

  • Click and drag the item into the 'New Bin' row.
  • Set the quantity to move to 1.
Fig 5.1

This can be repeated for multiple items, as well as the same items moved to different bins. Alternatively, you can use the Barcode Mode to perform the same action using a barcode scanner.

Now that our transfer has been packed, set the status to In Transit to send it off to Warehouse 2.

Note: Transfers that are in transit cannot be changed, as they are in neither location.
Fig 5.1  Add New Bin

Step 6 - Receiving the transfer

  • Change the transfer status to Checking In

Once the transfer has been delivered to Warehouse 2, we need to check in the items to make sure that what was sent is also what we received. We'll go by the assumption that all stock items that were sent were received and we will set the received quantities to be equal to the sent quantities.

We will first create and assign one of our items to a new bin.

  • Edit the Received Qty for each row to be equal to the Sent Qty. Fig 6.1

Again, like with Pack Transfer, we can use the Barcode Mode to perform the same action, but with a barcode scanner.

We have now successfully sent stock from Warehouse 1 to Warehouse 2, set the transfer status to Delivered to finish.

Fig 6.1  Check In Stock