Amazon Location Mapping
Overview
The following feature has been designed to extend the control over the stock levels sent to Amazon by allowing for the selection of multiple specific Linnworks locations which can be used to set the stock level on Amazon listings.
Quick Guide
Here's the quick version of the instructions, for those that are already comfortable with performing such tasks. If you require full instructions please refer to the Detailed Guide
1. Goto Settings -> Channel Integration
2. Click Config for the required Amazon channel
3. Enable Update Inventory from Location
4. Click Location Mapping
5. Enable required Location(s)
6. Apply changes -> Apply changes
Detailed Guide
By default Linnworks will share the total available stock level for all locations to the channel during the sync. This can be restricted to specific location using the following steps:
1. Settings -> Channel Integration.
|
Fig 1.1 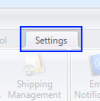 Fig 1.2 Fig 1.2  |
2. Click Config.
|
Fig 2.1 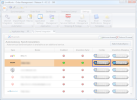 |
3. Enable Update Inventory from Location
|
Fig 3.1 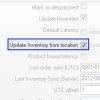 |
4. Click Location Mapping
|
Fig 4.1  |
5. Enable required Location(s)
|
Fig 5.1 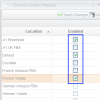 |
6. Apply Changes
|
Fig 6.1  Fig 6.2 Fig 6.2  |
