Bulk Category Import
You can use the Linnworks Data Import tool to add the same category to multiple inventory items in bulk.
First, you will need to run the Data Import tool found in your Linnworks install folder.
The main screen should look like this:
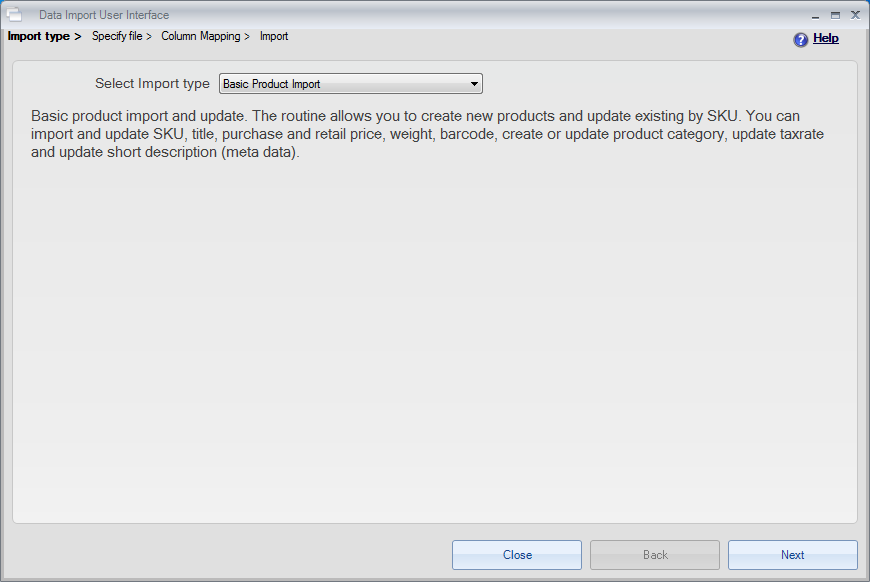 Choose Basic Product Import and press Next.
Now we need to select a file. There are two ways that you can structure your CSV file for this.
Method 1 – Different Categories
If you have a CSV of your SKU’s, but each item wont necessarily be in the same Category, then you will need to create a CSV like so:

Remember to save this Comma Separated Values file with the extension .csv
Once you have selected the file, click Next.
Now, because the File we created has column headers that match Linnworks expected headers, you can see that they are already mapped for us. All we need to do now is click Next, and we can begin the import.
Method 2 – Single Category
If you have a CSV file containing SKU’s that all need to be in the same category, then there is another method you can use.
For this method, your CSV can contain just the SKU’s like this:

Now, once we have selected a file and clicked Next, we can find the ‘Category’ Column and, in the drop down for ‘File Column’, Choose ‘Default Value’

Clicking away from this selection will open a new window.
In this window, we will choose a name for the Category, and click OK.
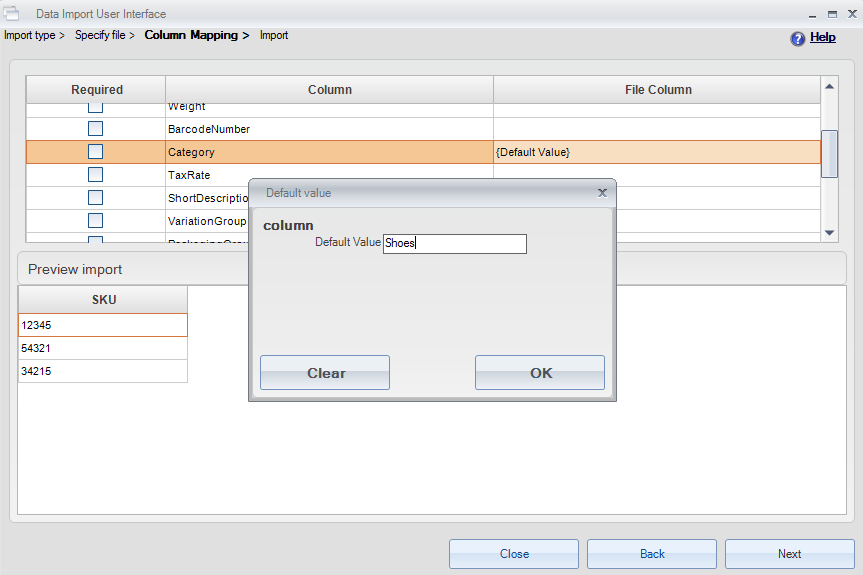
This will tell Linnworks to put all of the SKU’s in this CSV into the Default Category that you defined.