You are currently viewing documentation for Linnworks Desktop, if you are looking for Linnworks.net documentation, click here.


Edit Transfer

Overview

The edit transfer screen is where transfers are edited and transfer changes are taken place. Stock items can be added to the transfer, transfer notes, and transfer properties, and transfer status change actions are all accessible on this screen.

Transfer Status

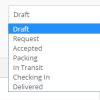
The current state of the transfer is displayed in the Transfer Status selection box. There are 7 transfer statuses Fig 1:

  • Draft - The first stage of all transfers, represents a transfer which is not yet ready for request.
  • Request - The draft has been completed and is a request to the 'To' location.
  • Accepted - The request has been accepted by the 'To' location and is currently being picked.
  • Packing - Requested stock has been picked and is now being packed, ready to be delivered.
  • In Transit - The transfer has left the 'From' location and is in transit.
  • Checking In - The transfer has been received and is being verified.
  • Delivered - The transfer has been delivered from the 'From' location successfully.

Status' indicate what phase the transfer is currently in, they follow a linear path from Draft, to Request, and then onwards to Delivered.

Fig 1  Transfer Status
Note: Once a status has been changed, it cannot be changed back to a previous status. For example, if a Draft transfer is changed to Accepted, it cannot be changed back to Draft, or Request.

From & To Location

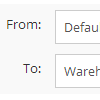
The 'From' and 'To' location represents the locations of which stock will be transferred from, and where stock will be received. The 'From' location will send stock to the 'To' location. Once the transfer has been accepted, these locations cannot be changed. Fig 2

To change the 'From' or 'To' location, simply click on either one of the selection boxes and select a new location.

Fig 2  Location Select
Note: If both the 'To' or 'From' location is different to the current location, it will not be visible on the main warehouse transfer screen unless the current location selected is either the 'To' or 'From' location, or 'All Locations'.

Add Item

Clicking on the Add Item button will allow you to search for a SKU in your inventory and add this item to the transfer. The request quantity can be changed and any disrepancies between the request quantity and the available quantity in the 'From' location can be created as a new transfer.

For example, if the request quantity is greater than the available quantity in the 'From' location, you can create a new transfer for this disrepancy, as there is not sufficient stock to send.

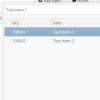
To add an item to a transfer: Fig 3

  • Click on Add Item
  • Search for the SKU or Item Title of the desired item
  • Click 'Select' to add
Fig 3  Add Item
Note: Composite parents cannot be added to a transfer.

Add Transfer Notes

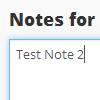
The View/Edit Notes screen allows you to view existing, and create new transfer notes. These are viewable from all transfer status's. You can also add notes to individual transfer items by clicking on the 'View/Edit Notes' icon on the item.

To add a transfer note: Fig 4

  • Click on Notes
  • Type a message in the text box
  • Click 'Add Note'
Fig 4  Add Note

Transfer Properties

Custom transfer properties can be added to the transfer through the Properties menu.

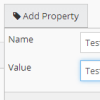
To add a transfer property: Fig 5

  • Click on Properties
  • Click on Add Property
  • Enter property name and value
  • Click on Save

After a property has been added, it is possible to edit or delete the property by clicking on the 'Edit' or 'Delete' icons on the property row.

Fig 5  Add Property

Audit Log

The Audit Log screen displays all of the activity on a transfer, such as its creation date, and the dates of status changes. This will allow you to easily see what has happened with the transfer. Fig 6

Fig 6  Audit Log

Delete Transfer

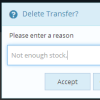
A transfer can be deleted providing that it has not yet reached the status of 'In Transit', this is to ensure that stock is not stuck in limbo between two locations. Fig 7

Fig 7  Delete Transfer